


I put off my personal website for 8 years. Then built it in 3 days with AI.
But AI only helps if you know what you want to do.

This weeks writing longer than usual.
I include an 8 step process to build your own site/app below.
I designed and built www.dominikgmeiner.com
When I started my career as a designer, the importance of a portfolio was drilled into me during University, its was the calling card, the price for admission — the way people could evaluate your past work and how you communicated. If you wanted to work anywhere worth working you’d need a good portfolio.
All I heard was: Good portfolio equals money, bad portfolio equals mountains of student debt and no one liking me. So making my portfolio became my hobby.
I made two a year.
Designing page layouts in Adobe Indesign, learning how to take photos of what I built, learning what fonts don’t work together, writing and rewriting descriptions, and let’s not forget actually building the stuff I could put in a portfolio.
Then as was common — I printed the books.
I would have perfect-bound books printed working to get just the right paper. All this so that I could mail them off to studios, schools overseas, or to bring to interviews with potential companies to work with.
14 years later I can say it worked! But I found that work followed work, and eventually I stopped indexing and cataloging my work in the same way.
Time passed and times have changed. Portfolios have become PDF files or websites. I can’t remember the last time I reviewed a paper portfolio, I know the last one I printed was in 2014.
I learned so much making these, I told myself I’d do it again one day. But building a personal website is a mountain a lot of us face, even if you’re not a design.
It’s that thing we said we would do — but just like me — we put it off for 8 years.
Why? Because it's hard. It forces you to look at how you want to present yourself, reflect critically about your work and what you want to say.
So we don’t do it, or we half ass it and it becomes a continually todo looming over your head for years.
Your work experience is like the ingredients that make up your career
Going so long without cataloging my work, I lost track of a lot of the little skills and things I’ve done, and I started to take for granted what I know.
Especially as I moved from the design of physical products, to designing software, then services and my work became less and less tangible. Not always something I could always take a picture of. How you photograph aligning a division and improving an API?
There's an analogy I've used often. Not keeping track of all of my work, I sealed myself in a jar. While you’re still inside the jar — its hard to know what's written on the label. I knew my skills are valuable but what was it that had people coming to pick up me off the shelf? Perhaps this analogy breaks here. But I hope you get what I mean.
I feel like ingredients of my career have kinda all fermented together, making it hard for me to categorize myself by normal job descriptions.
So I had my work cut out for me, after 8 years, to sort out what I wanted to say.
But I know this this — With how much I learned making my portfolios in the past, I even though now I could hire someone to do this work for me and save me the weeks of headache, I decided to design and build it myself. I want to build and control how I present myself to the world and this felt like a nice way to do it.
And good news my fellow nocho loving friends, You’re reading this because I DID IT!
And it took so much less time, than I first thought it would. Which is why I took the time to write out in detail the path I took to build my site using AI.
I tried building websites for myself in the past with Carrd, squarespace, and webflow. Each time giving up half way through. This time I did it, and I had fun 93% of the time doing it.
Short summary: I used AI tools in three ways.
Transcribing my voice into text so I could work faster.
Having AI frame my projects based on my writing and talking out stories.
Do all the coding to building the site, and an admin tool for content management. Making it easy to edit and adjust the content.
Below I break down in 8 steps how I built my new site
1 Who I want my site to be for?
In my case, I had no clear message or idea really.
I got to this by sitting down with my brother at my dining table and writing it out on paper. Jotting out bullet points of my past projects and talking through what I did at each project to work out high level different themes and categories.
new product innovation
Venture building
Scaling teams / management
International team / hiring
Hardware / industrial design
Software
Start-ups
Getting funding
Contracting
Etc.

My brother Timo and I working on IKEA drawing rolls at my dinning table.

Creating these categories helped me reframe and look at the work I've done in the past in a different way. Looking at my thinking on the page I worked out roughly what I wanted:
I’m writing for an executive audience, people who appreciate concise and to the point messages. This site is an introduction for further conversation.
I wanted to show I have a breadth of experience.
I want to give confidence, and to have people feeling comfortable that I could guide their teams through ambiguous waters.
2 What Do I want to share?
Creating a design before you know the details you wanna share is one of the biggest mistakes I saw designers, and product people making previously in my career. Because you can end up coming up with something that looks really great but as soon as start to fill out the design with the text and pictures everything just looks wrong.
I also had this problem early in my career, designing everything in English and then having to make the design work in German — My god was it frustrating how descriptively long German words can be — but that’s a different story!
Creating a design before you have the content is also perhaps why buying templates can feel like it doesn’t work for you — it looks good with Lorem ipsum and placeholders but when you put your own stuff it just doesn’t feel right!
So having created a list of project, I started writing a train of thought about everything I could to describe the project, the situation and context of the work, The actions I was taking, and the results the project got, and lastly a lesson I learned.
Having already spent weeks writing these kind of things before, I already had some existing documents and I knew I didn’t want to spend more time rewriting everything.
So instead, I took a different approach talking out my projects individually with chatGPT.
Rather than writing, I just talked though everything, and/or pasted in what I had already written. Then used a prompt and Chat to help structure my thoughts.
Prompt I shared at the start of each text snippet.
I would like to talk through a situation I will include below. Then I would like to have you help me define the title, situation, action, result, and lesson learned in one short sentence for an executive audience to be able to quickly review and spark discussion, and inspire confidence I can help them.
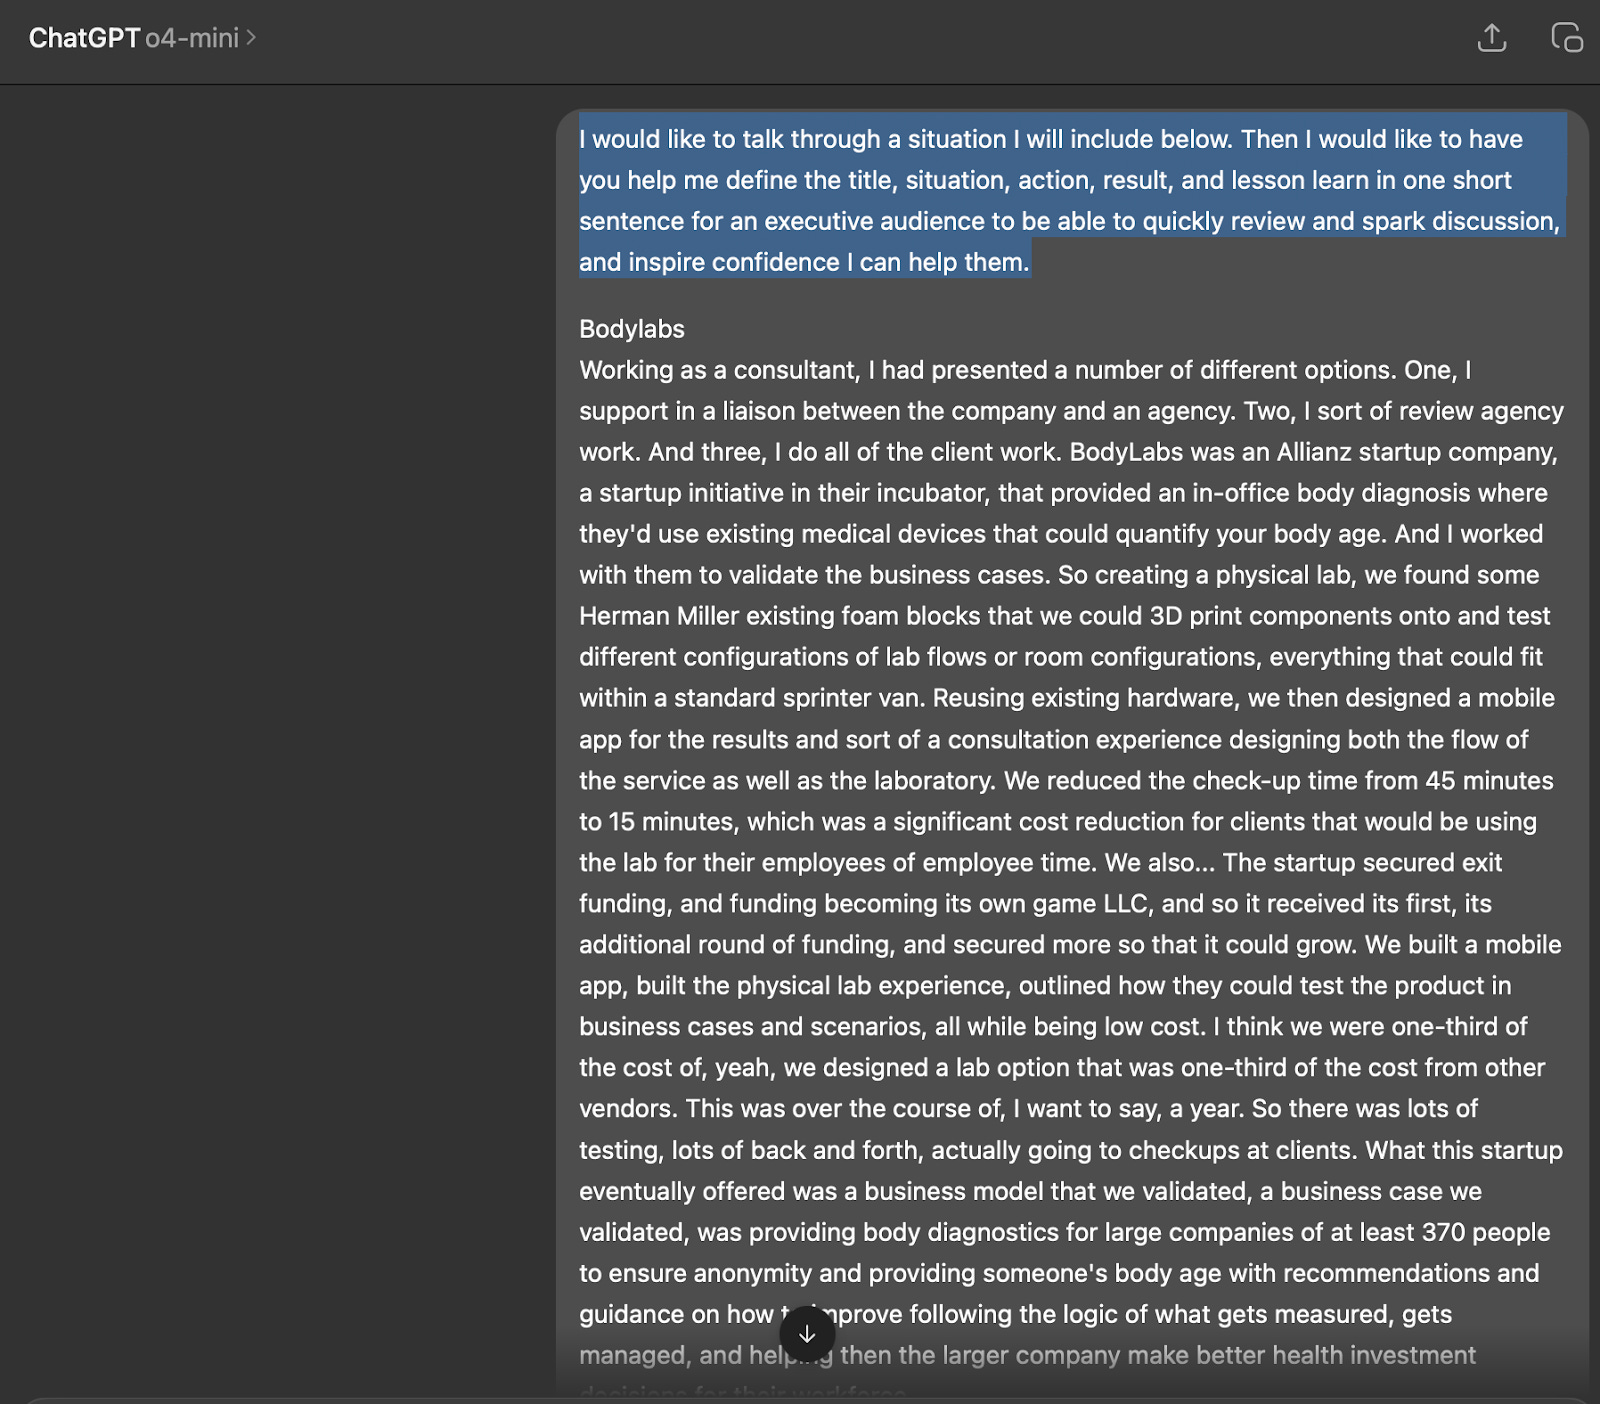
Now I ended up needing to rewrite most of what the AI gave me, but it significantly sped up this process, getting through 25 projects in about three hours, and helping me reframe my thinking!
The outcome
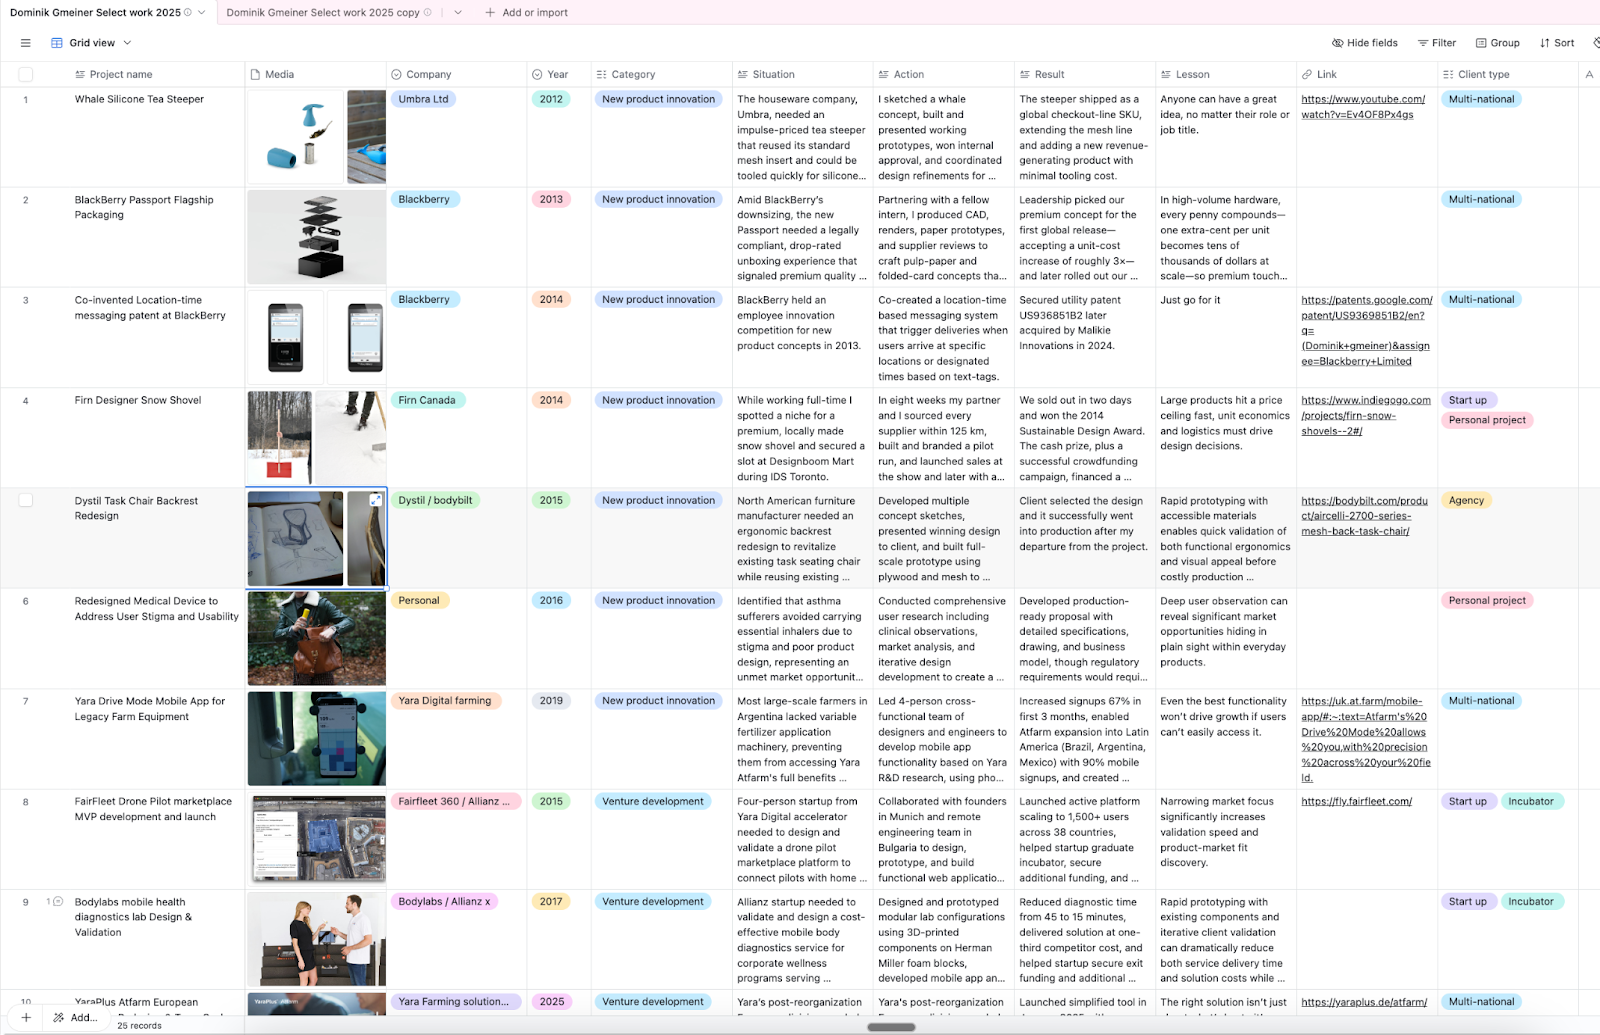
I created an Airtable to list out the projects
One sentence maximum two per category situation, action, result, and lesson learned.
Then dug up links, and photos. So each row was one project.
This was my thinking for why to use airtable
I like the tool I think it’s very user-friendly — i built a lot with it in the past.
My hope was that it could be a content management system (CMS) that I could connect to my website so that any changes I made here would show up on the website made my life easier in the future. ( Little teaser that totally didn’t work for me more on that later).
Next was designing the page.
3 Look at what i liked — fonts, colours examples.
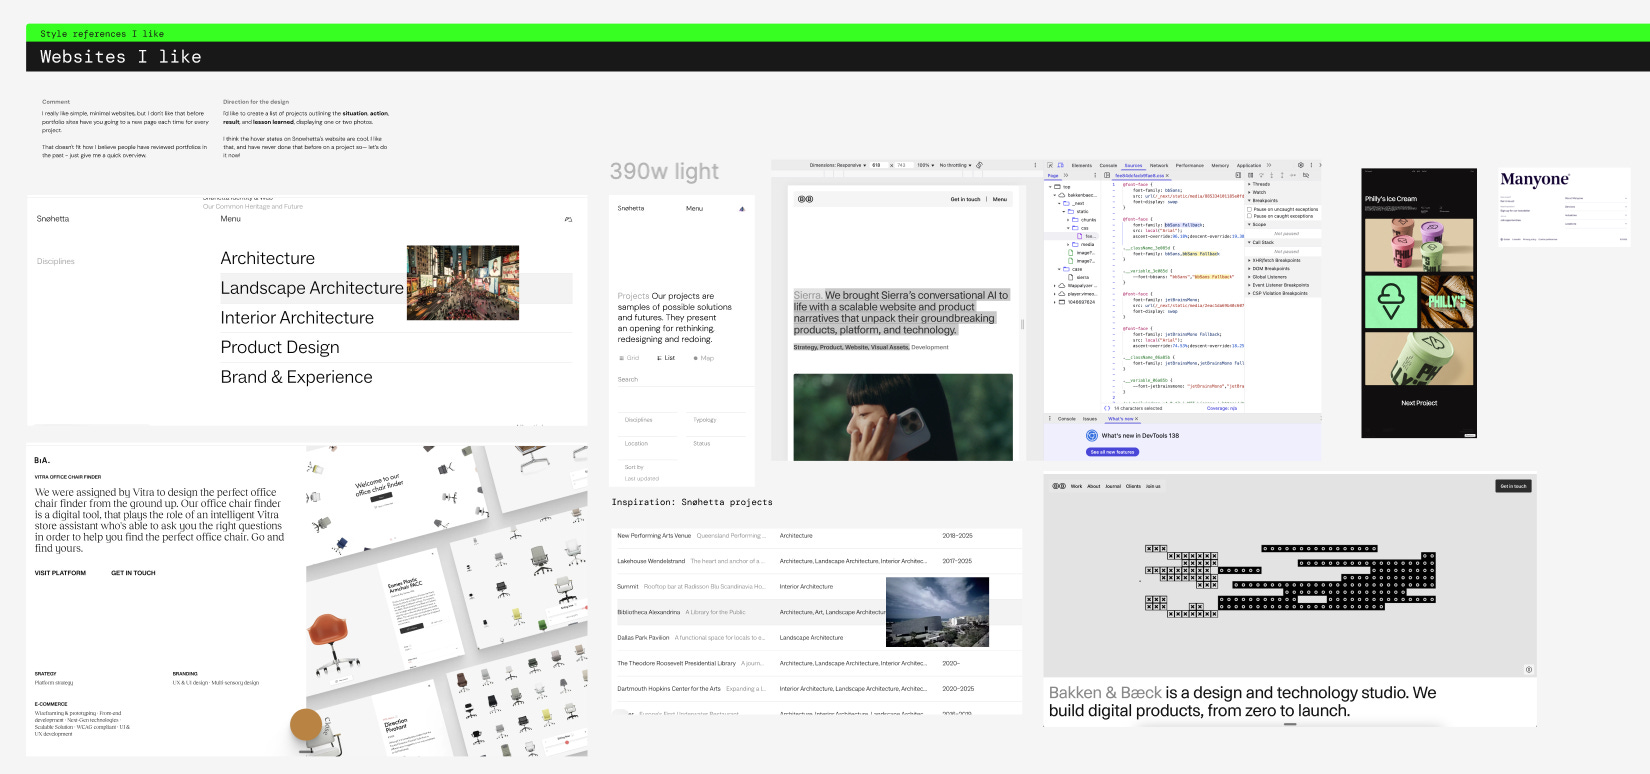
When I was making print portfolios, I remember tearing pages out of magazines, looking at other people’s portfolios and creating a bit of a mood board visual reference. I did a mini version of that.
But because I worked out my goal in step 1, was to present to an executive audience and share maximum five lines of text to present each project. I could look for specific examples. I want a design that is nice to browse, minimal, and has very little colour.
So I looked for references, googling Studios, magazines, fashion brands, and template sites. And I found a couple things I really liked on an an architectural company’s project site.
4 Box it out. start placing my content into the design and explore
The next big mistake I often see people making, and I have 100% made this mistake in the past.
Is immediately diving into creating a design for your interface or website getting caught up in all the little details.
To avoid doing that I use boxes in text breaking up how I wanted my information to show up on the site.
Outcome looked like this.
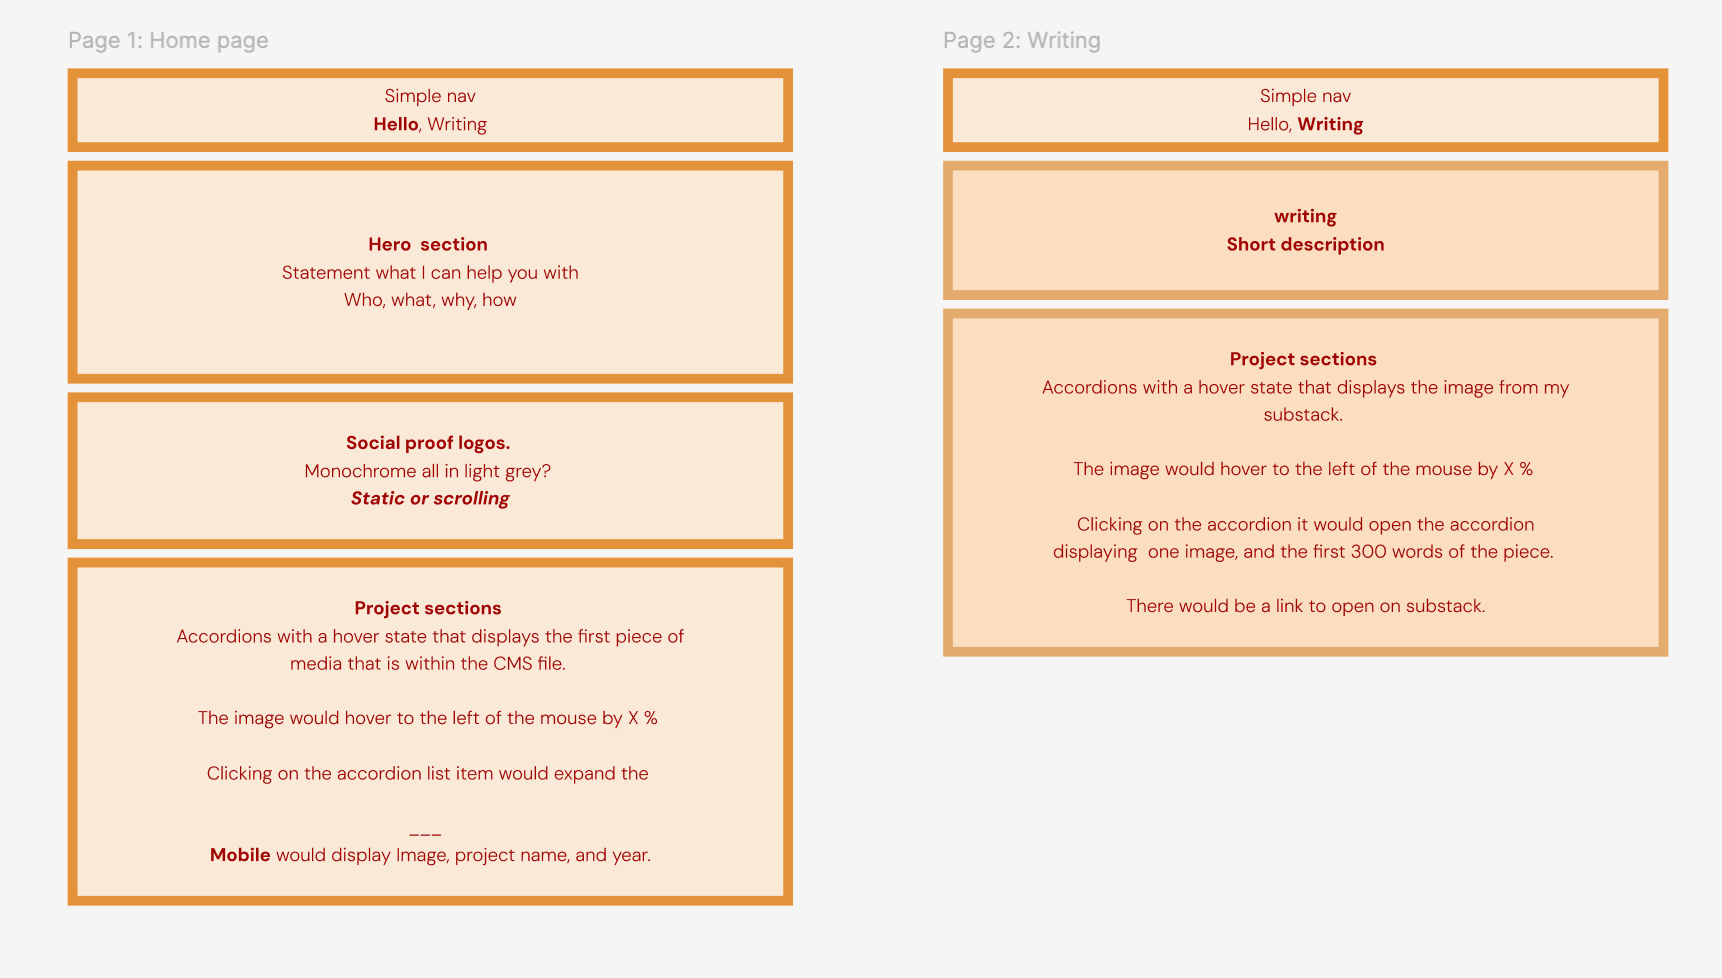
This is a great time to also describe what type of functionality or Hover states or interactions you’d want on your page. Think in terms of sections, and describe a bit of how you want each section to work, or what you would like to see.
If you’re designing multiple pages, this is where you start creating flows showing how the pages interact. Think of this as a funnel. What is the goal you want them to acheive, and what are then all the steps to get them there?
This let’s you quickly workout the thinking, without losing too much time in details.
The Architect Frank Lloyd Wright has a quote I’ve reference a lot, "You can use an eraser on the drafting table or a sledgehammer on the construction site".
Even when you're making software that can be “quickly updated”, you can still start really light and save yourself a lot of time.
I really like this step in the process
5 Designing the look
This is when I take the text I’ve already written it, and images I have and start putting it onto the page. Even if it’s perfect, it helps you get an idea of what you’re looking for.
A big note now that we have our new AI friends many of you may and can even skip the step completely. If you’re building with an AI, just upload your inspiration as screenshots, URL and or some description of what you want. AI a fantastic job of duplicating the style.
But since I spent years designing physical and digital products, I wanted to design this interface myself, even if it was basic and I knew it would take more time. So I used figma and made a few versions.


Once I had the design, rather than building a scratch and Inflicting pain on myself, I looked at MCP Servers* and plug-in for Figma. Things I wanted to try and thought would be fun to use.
Let me EngiNerd here for a second, don’t worry I won’t get to technical and this isn’t that important — but I wanted to explain how I understand MCP.
* MCP (Model Context Protocol) server is something pretty new, so I want to play with it. It’s like a magic bridge that lets your AI models connect to different systems or like a USB-C attempt to have different tech work together.
I found something on Github i could use so i thought — hey let’s try this.
This gets us to the next step: building it!
6 Building the site
When I trained to become an industrial designer, they taught us how to work with the materials. How to work with metals and shape woods, form plastics and cast. Because the logic was the better you understand materials and tools for manufacture the better you can design.
This stayed with me so now that I’m building digital products. I wanted to learn a code and I really liked cursor because within it settings, I could add specific prompts for it to teach me what the AI agent was doing, add excessive comments and talking to me like a child who always asks why. Explaining in detail what it was doing, how it worked.
I will safe same time in saying even though I started building with an MCP server, to take Figma designs to Cursor I got way to frustrating — Lost so much time — So I started over with replit.
Building with Replit
When your mind gets stuck, move your body so I went to the gym for an hour and came back with a different idea.
My attempt to build this with Cursor wasn't panning out, so I switched to use Replit, and they had just built a plug-in I wanted to try. You select your design in Figma, and based on the design, it generates a prompt that you paste into Replit. This worked amazingly.
Starting with the mobile screen size I was very surprised by how well it was able to match my designs.
Used this plug-in to turn my design into a prompt
https://www.figma.com/community/plugin/1326990370920029683/figma-to-code-on-replit-react-html-css
https://replit.com/refer/dominikgmeiner ( I get $10 in credits if you use this link)
7 Building the site management tool & adding my details
Building the integration with Airtable was nowhere near as simple as the documents made it seem to be, or perhaps it was just beyond my current skills. I couldn’t get it to work both with either Cursor or replit.
So I built my own site management tool as a suggestion from the AI.


This gave me two password protected tools.
One a portfolio management tool that allows me to edit the text, the order of images order and to set which image I want to be my main hover image.
As well as an uploader. Letting me me upload the CSV of my Airtable which had all of the text i’d written.
I then spent a little while having a chat back and forth with Replit to refine the design, adjusting fonts and simplifying the code. This ended up costing me $14 to build.
Closing thought
Yes, I absolutely could have built this in Framer, and I could have used ChatGPT to make the custom code for me for displaying my CMS on the same page. That being said, I wanted to experiment more with these new AI tools, and this felt like a great way to do it.
If you follow these steps you will have a site of your own. *Yes, there's more nuance than I'm sharing here, but I hope this shows you that it’s possible and how you can also build your own site.
PS.
I’m thinking of doing a paid live session on what I believe is still the most important part of skills in design, and how to build your own personal apps with AI.
If you’d be interested hit reply and let me know by saying “YES” or add a comment if you’re here on Substack!
Thanks for reading my writing! If you know someone who’s been stuck on their site—or sitting on their story—send this their way.
It might be the nudge they need to get building.
It took me poking around for a while to discover the content available under each project link, and that was the moment I went, "wow, this is cool, there's a lot of meat here." Some better indication of that content being present and how to get to it might be useful as the site looked quite static to me at first glance.
Yes. I would be interested in this.